Recently I have started a backend development using microservice and serverless architecture for our web and mobile applications. So in this post, I’m going to explain each and every part of our backend architecture that is built using AWS services, hoping that it may help others too for serverless backend development. So, let’s understand it stepwise.
Tools, Technologies and services we have used
- Javascript + Typescript + NodeJS as backend programming language and runtime.
- NestJS as backend framework in Monorepo mode
- Serverless framework
- MongoDB as an Application database hosted on mongodb atlas.
- AWS Services - Lambda, SQS, S3, Cognito, IAM, Api Gateway, System Manager, SES, SNS, EventBridge, Cloudwatch, Cloudformation
Why is the above tech stack for our backend? Let’s discuss key points.
Microservice architecture: A microservices architecture is a type of application architecture where the application is developed as a collection of services. It can be very helpful to build backend in multiple small services that focus on specific functionality or processing with an easy to maintain code base and auto scaled deployments on lambda or kubernetes.
Serverless architecture: A serverless architecture is a way to build and run applications and services without having to manage infrastructure. Your application still runs on servers, but all the server management is done by service providers like aws, azure etc. You no longer have to provision, scale, and maintain servers to run your applications, databases, and storage systems. By using a serverless architecture, developers can focus on their core product instead of worrying about managing and operating servers or runtimes.
- NodeJS is very suitable for microservice-based and server-less applications. You can easily divide your app into its parts and place each microservice in a team and develop every section as per the need without affecting other sections. It is the perfect platform to create low-latency apps so it’s best when we have to process a high volume of short messages and easily we can use socket.io with nodejs to build real time features. Great community support with a large npm library of packages and frameworks to speedup development.
- NestJS is an advanced Node.js backend framework which is suitable for building enterprise-level projects. It has a wide range of libraries that implements Typescript. It provides flexible project structure for monolithic and microservice based highly testable, scalable, loosely coupled, and easily maintainable applications.
- The Serverless Framework helps us to develop and deploy AWS Lambda functions, along with the AWS infrastructure resources they require. It can manage code as well as infrastructure with multiple languages support.
- Schemaless database was our requirement as per nature of our application, So we choose mongodb atlas as hosted service for great performance, security and scalability.
- Secure, auto scaled and pay as go was our key requirement to deploy our backend microservices. AWS provides lot’s of services that can be useful to build and deploy auto scalable backend that build using NodeJS and it’s frameworks. So AWS is our first choice for many projects.
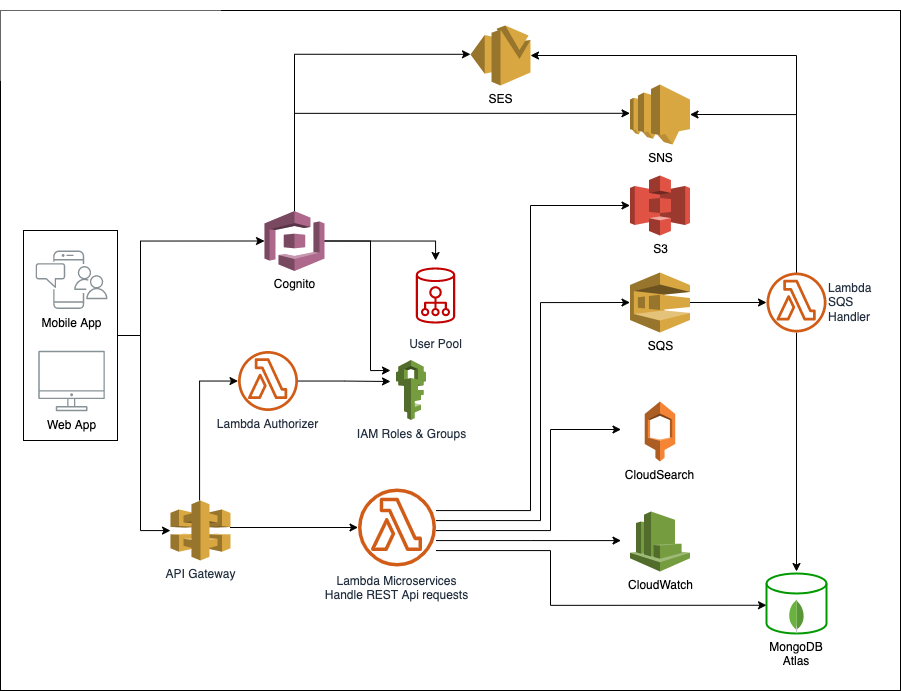
A look at higher level backend architecture
Our development environment overview
a. Operating System
$ sw_vers
ProductName:	macOS
ProductVersion: 11.3.1
BuildVersion: 20E241
b. NodeJS
$ node --version
v14.18.2
c. NPM
$ npm --version
6.14.15
d. AWS CLI
$ aws --version
aws-cli/2.1.15 Python/3.7.4 Darwin/20.4.0 exe/x86_64 prompt/off
e. Serverless
$ serverless --version
Framework Core: 3.12.0
Plugin: 6.2.1
SDK: 4.3.2
f. AWS Profiles
$ nano ~/.aws/credentials
[dg-dev]
aws_access_key_id = AK****************
aws_secret_access_key = ******************

$ nano ~/.aws/config
[profile dg-dev]
region = ap-south-1
output = json
Create NestJS project
Nest has two modes for organizing code, Standard mode and Monorepo mode. We are going to use monorepo mode as we want to build individual microservices that act as small independent backend apps and deploy on aws lambda.
a. Install NestJS CLI, read more about NestCLI here.
$ npm install -g @nestjs/cli
b. Create NestJS project
$ nest new shop-backend
Choose npm when it asks you to choose a package manager and wait for the process, it will show you a success message once cli completes the project setup.
c. Test your newly created NestJS project with below commands.
$ cd shop-backend
$ npm run start:dev
Your terminal should look like this.
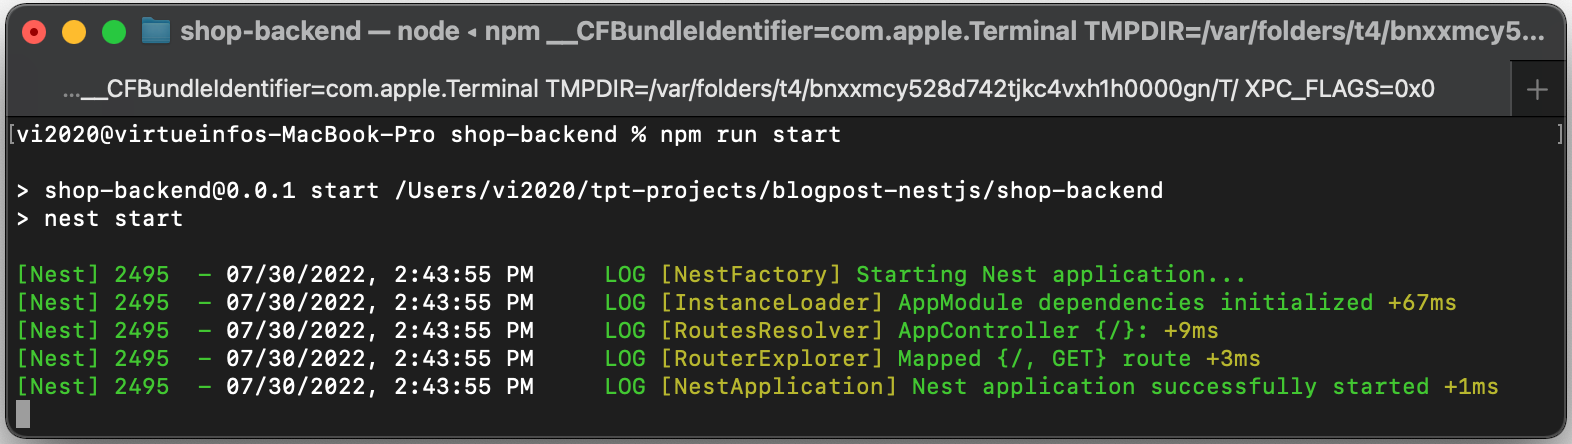
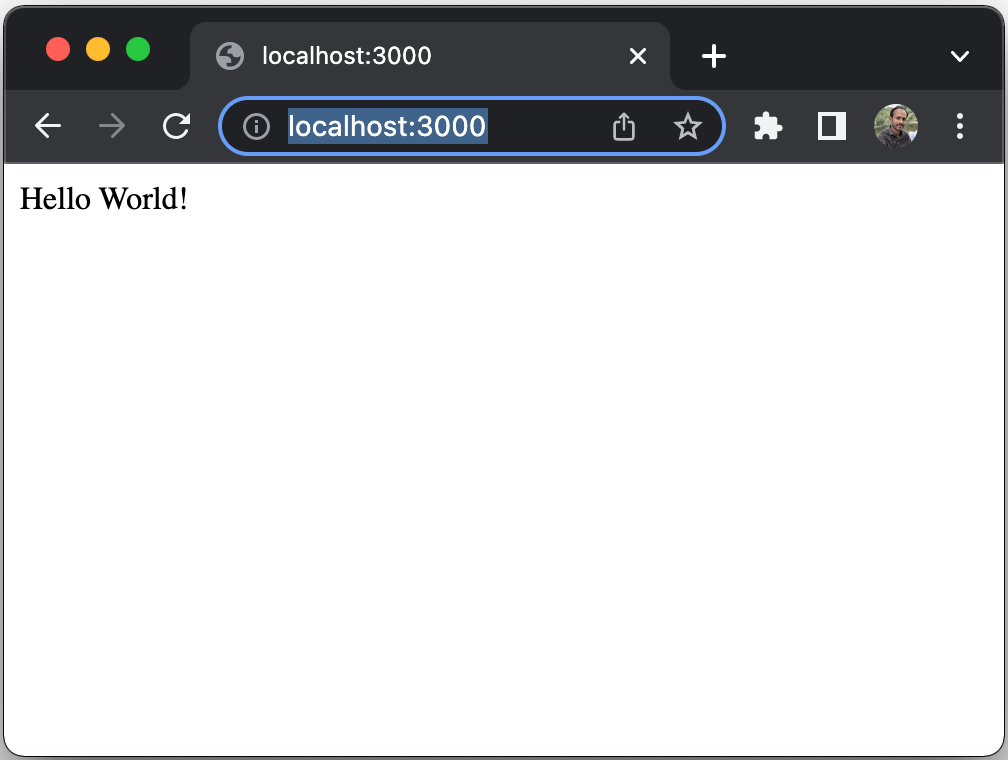
“npm run start” command starts the app with the HTTP server listening on the port defined in the src/main.ts file. Once the application is running, open your browser and navigate to http:// localhost:3000. You should see the Hello World! message.
Convert your NestJS project to monorepo mode
We have just created a NestJS project in standard mode, it's a functional application that needs to convert to monorepo mode.
Execute the following commands in your terminal to convert standard NestJS projects to monorepo mode.
$ cd shop-backend
$ nest generate app default
Above “nest generate” command will convert project structure to monorepo mode and add a default app with auto generated controllers and services. It will also move all the old app files (generated while creating the project) to the “shop-backend” directory. So now your project directory structure looks like.
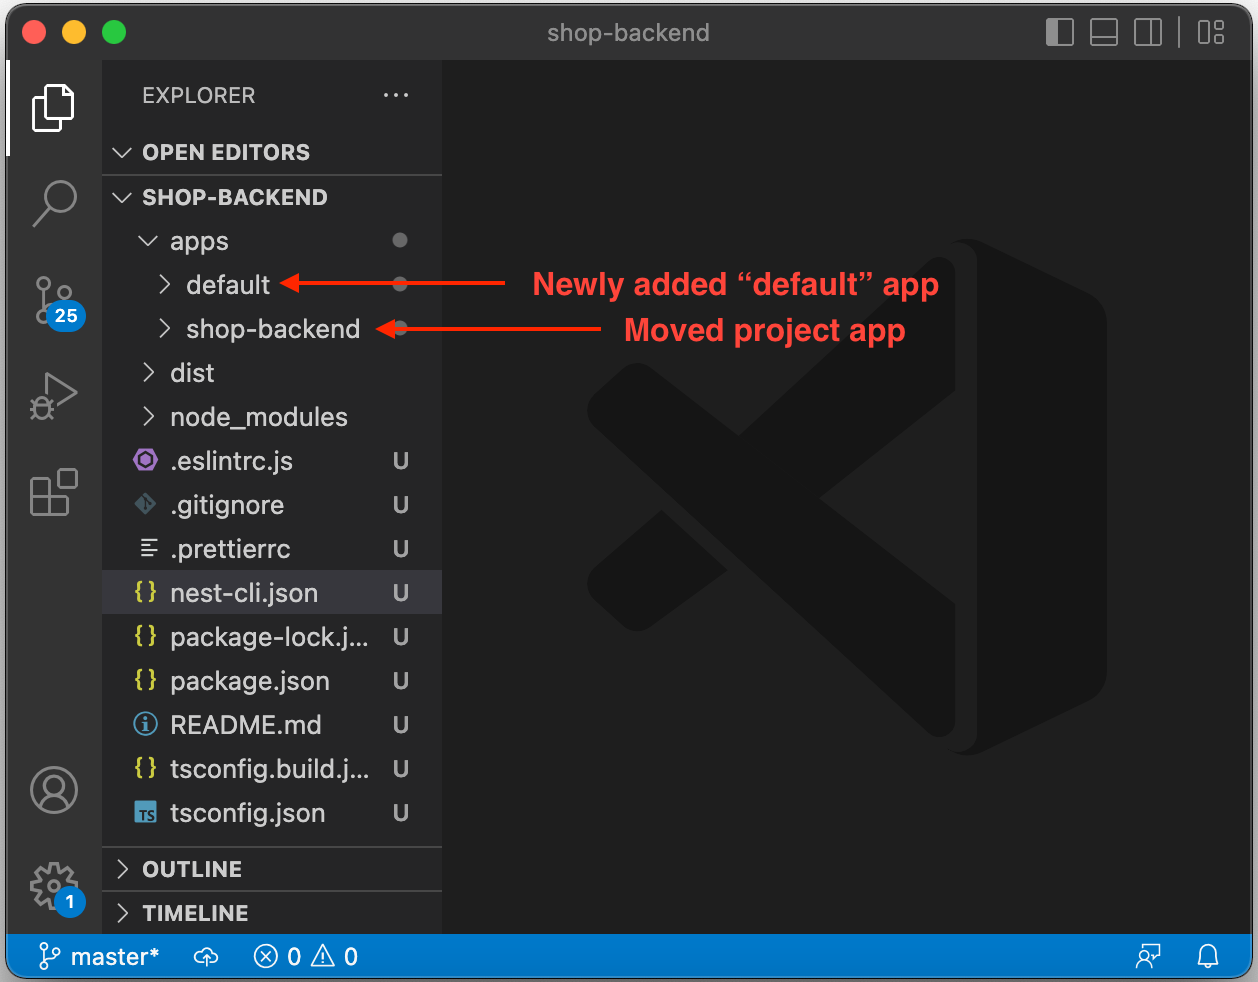
Our project directory structure is converted to monorepo mode, all our applications will be created in the “apps” directory.
Let’s remove the “apps/shop-backend” app first, because we don’t want an app with the same name as our project.
$ rm -fr apps/shop-backend
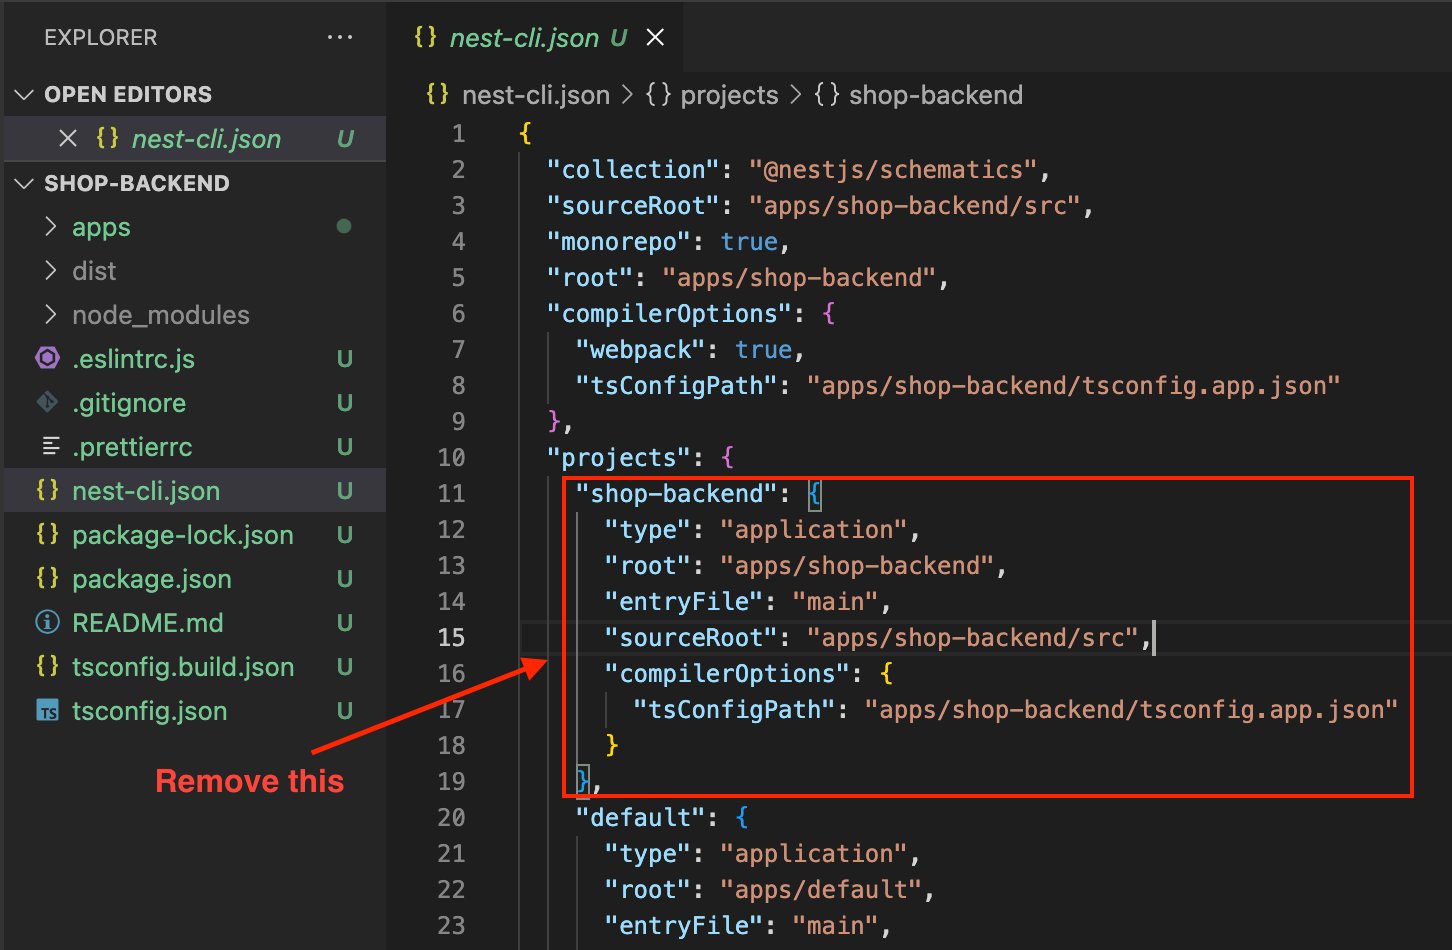
Also remove “shop-backend” related cli configuration from “nest-cli.json” file.
Now, let’s add a new app with the name “api-categories” with categories list, execute the following command at the root of project.
$ nest generate app api-categories
Let’s test our api-categories app, using “nest start” command:
$ nest start api-categories
Your terminal should display a success message, and you can access the api-categories app using the url “http:// localhost:3000” in your browser.

Review generated files of api-categories app, later we will modify it to add categories list api. First let’s prepare our project for deployment and api publishing using serverless framework and aws services like lambda, api gateway.
Install required npm packages to use serverless framework in our project.
$ npm install dotenv --save
$ npm install @vendia/serverless-express --save
$ npm install aws-lambda --save
$ npm install @types/aws-lambda --save-dev
$ npm install serverless-nest-monorepo --save-dev
$ npm install serverless-offline --save-dev
$ npm install serverless-plugin-typescript --save-dev
Add “webpack.config.js” file at the root of the project with the following code.
module.exports = (options) => {
  return {
    ...options,
    output: {
      ...options.output,
      libraryTarget: 'commonjs2',
    },
  };
};
Replace update tsconfig.js with the following code.
{
  "compilerOptions": {
    "module": "commonjs",
    "declaration": true,
    "removeComments": true,
    "emitDecoratorMetadata": true,
    "experimentalDecorators": true,
    "allowSyntheticDefaultImports": true,
    "target": "es6",
    "sourceMap": true,
    "outDir": "./dist",
    "baseUrl": "./",
    "incremental": false,
    "skipLibCheck": false,
    "strictNullChecks": false,
    "noImplicitAny": false,
    "strictBindCallApply": false,
    "forceConsistentCasingInFileNames": false,
    "noFallthroughCasesInSwitch": false,
    "esModuleInterop": true,
    "resolveJsonModule": true,
    "paths": { }
  }
}
Update keys in nest-cli.json file, as per below key value pairs.
"sourceRoot": "apps/default/src"
"root": "apps/default",
"compilerOptions": {
    "webpack": true,
    "tsConfigPath": "apps/default/tsconfig.app.json"
  },
Create “serverless.yml” at the root of your project.
service: "shop-backend"
plugins:
  - serverless-nest-monorepo
provider:
  name: aws
  region: ap-south-1
  runtime: nodejs14.x
  stage: dev
frameworkVersion: "3"
Update api-categories app to integrate serverless
a. Update apps/api-categories/src/main.ts file, main.ts file will initialize the app and expose main handler function that will process each lambda event that received from aws api gateway request.
import * as dotenv from 'dotenv';

import { ValidationPipe } from '@nestjs/common';
import { NestFactory } from '@nestjs/core';
import serverlessExpress from '@vendia/serverless-express';
import { Callback, Context, Handler } from 'aws-lambda';
import { ApiCategoriesModule } from './api-categories.module';

dotenv.config();

let server: Handler;

async function bootstrap(): Promise<Handler> {
  const app = await NestFactory.create(ApiCategoriesModule);
  app.enableCors();
  app.useGlobalPipes(new ValidationPipe({
    forbidNonWhitelisted: true,
    whitelist: true,
    stopAtFirstError: true,
  }));

  await app.init();

  const expressApp = app.getHttpAdapter().getInstance();
  return serverlessExpress({ app: expressApp });
}

export const handler: Handler = async (
  event: any,
  context: Context,
  callback: Callback,
) => {
  server = server ?? (await bootstrap());
  return server(event, context, callback);
};
b. Add “serverless.yml” at the root of your api-categories app, this will set up a serverless stack to use aws lambda and aws api gateway to deploy and publish api of our api-categories app.
# File: apps/api-categories/serverless.yml
service: api-categories

plugins:
  - serverless-plugin-typescript
  - serverless-offline

provider:
  name: aws
  stage: dev
  region: ap-south-1
  runtime: nodejs14.x
  memorySize: 512
  timeout: 10
  endpointType: REGIONAL

package:
  exclude:
    - .gitignore
    - README.md
    - serverless.yml
    - nest-cli.json
    - .prettierrc
  excludeDevDependencies: true
  individually: true

functions:
  main:
    handler: apps/api-categories/src/main.handler
    events:
      - http:
          method: ANY
          path: /api-categories
          cors:
            origins:
              - '*'
      - http:
          method: ANY
          cors:
            origins:
              - '*'
          path: "{proxy+}"
c. Update controller and service to return categories list as json response.
// File: apps/api-categories/src/api-categories.controller.ts
import { Controller, Get } from '@nestjs/common';
import { ApiCategoriesService } from './api-categories.service';

@Controller('categories')
export class ApiCategoriesController {
  constructor(private readonly apiCategoriesService: ApiCategoriesService) {}

  @Get()
  getAll(): object[] {
    return this.apiCategoriesService.getAll();
  }
}

import { Injectable } from '@nestjs/common';

// File: apps/api-categories/src/api-categories.service.ts
@Injectable()
export class ApiCategoriesService {
  getAll(): object[] {
    return [
      {_id: 1, name: "Art"},
      {_id: 2, name: "Science"},
      {_id: 3, name: "Math"},
    ];
  }
}
d. Run our app using a serverless offline command to test our first api.
$ npx serverless mono --nestApp api-categories --command offline
Your terminal should display like:
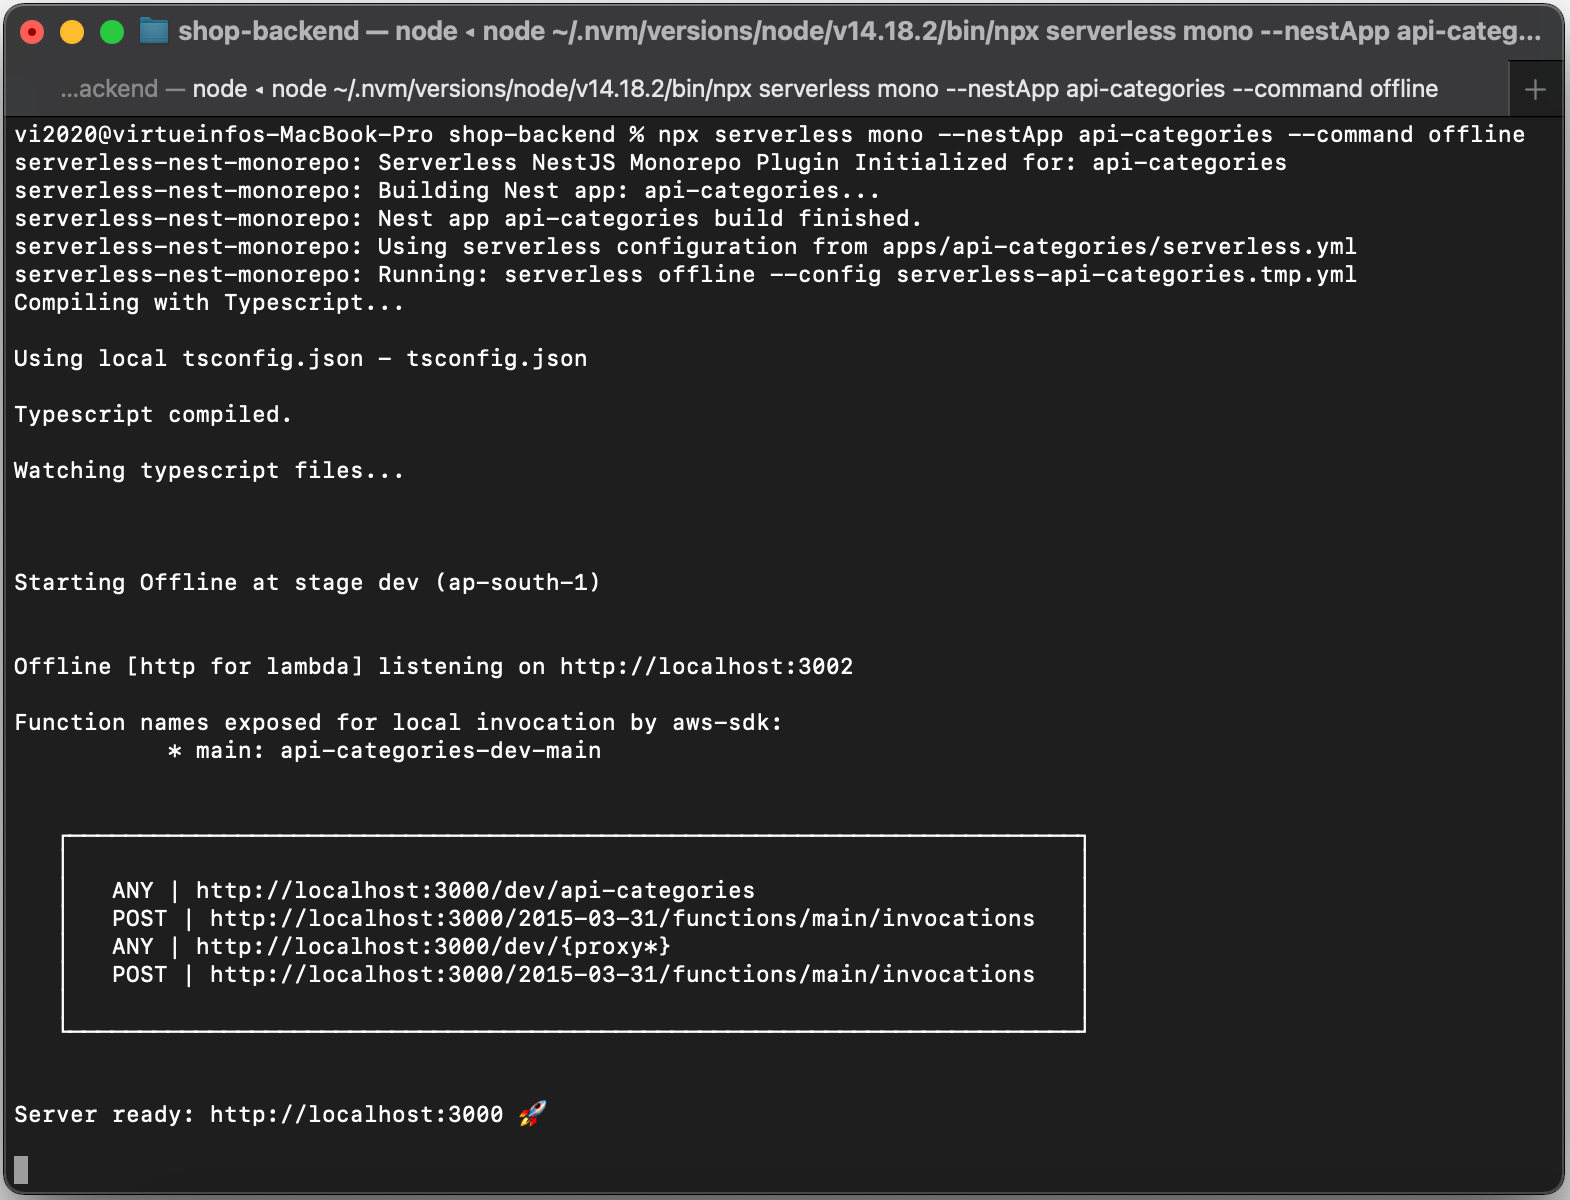
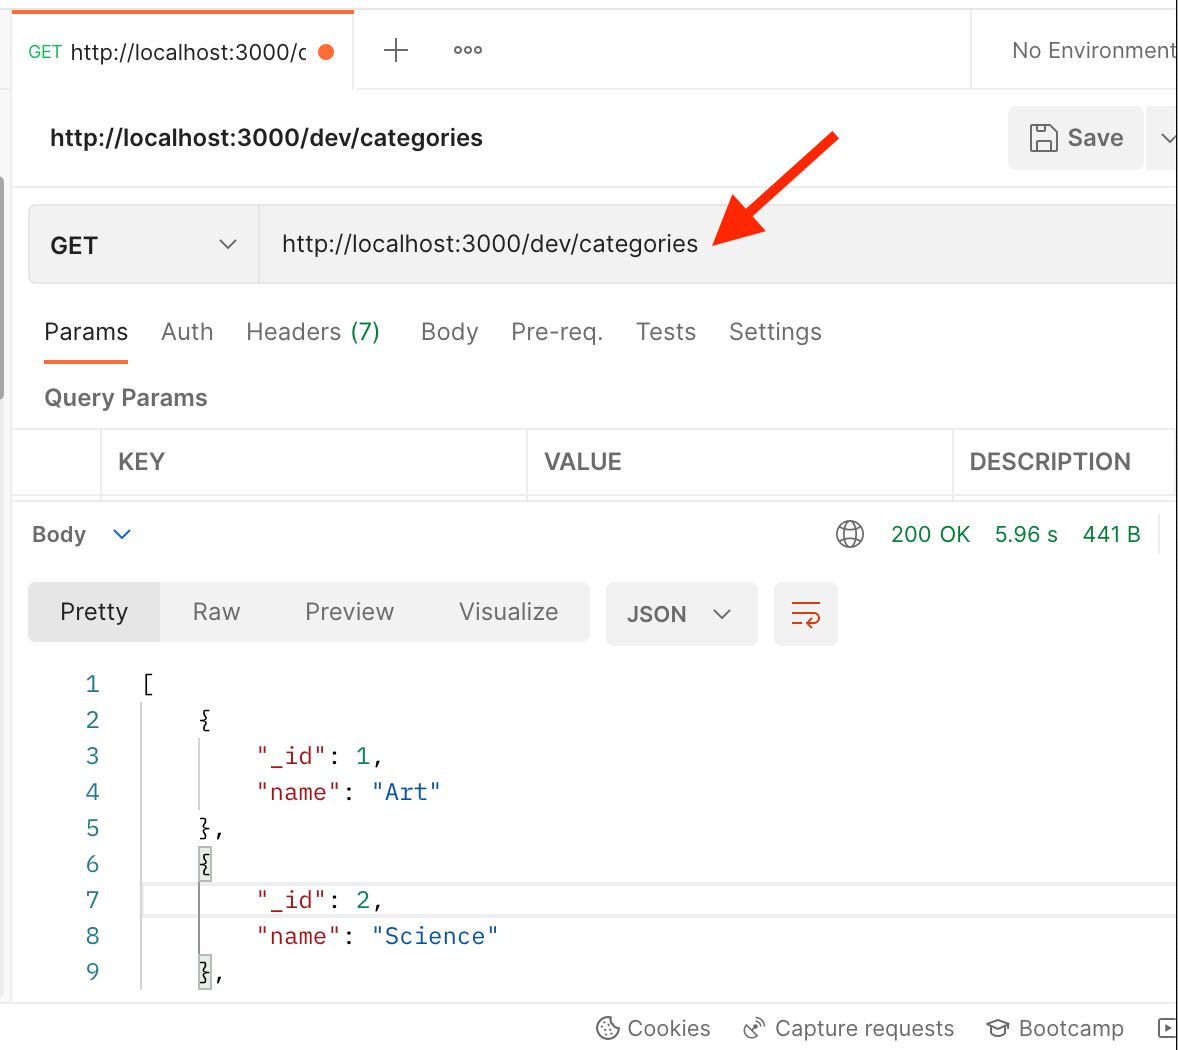
Now, you can send get request to our categories service using below url:
“http:// localhost:3000/dev/categories”
So, now we have an api-categories service running in our local development environment, let’s deploy it to aws, please note before deployment you need to configure aws profile using your aws credentials (access key id and access key secret).
e. Deploy service to aws lambda, execute serverless deploy command at project root.
$ serverless mono --nestApp api-categories --command deploy --aws-profile dg-dev
Your terminal should look like:
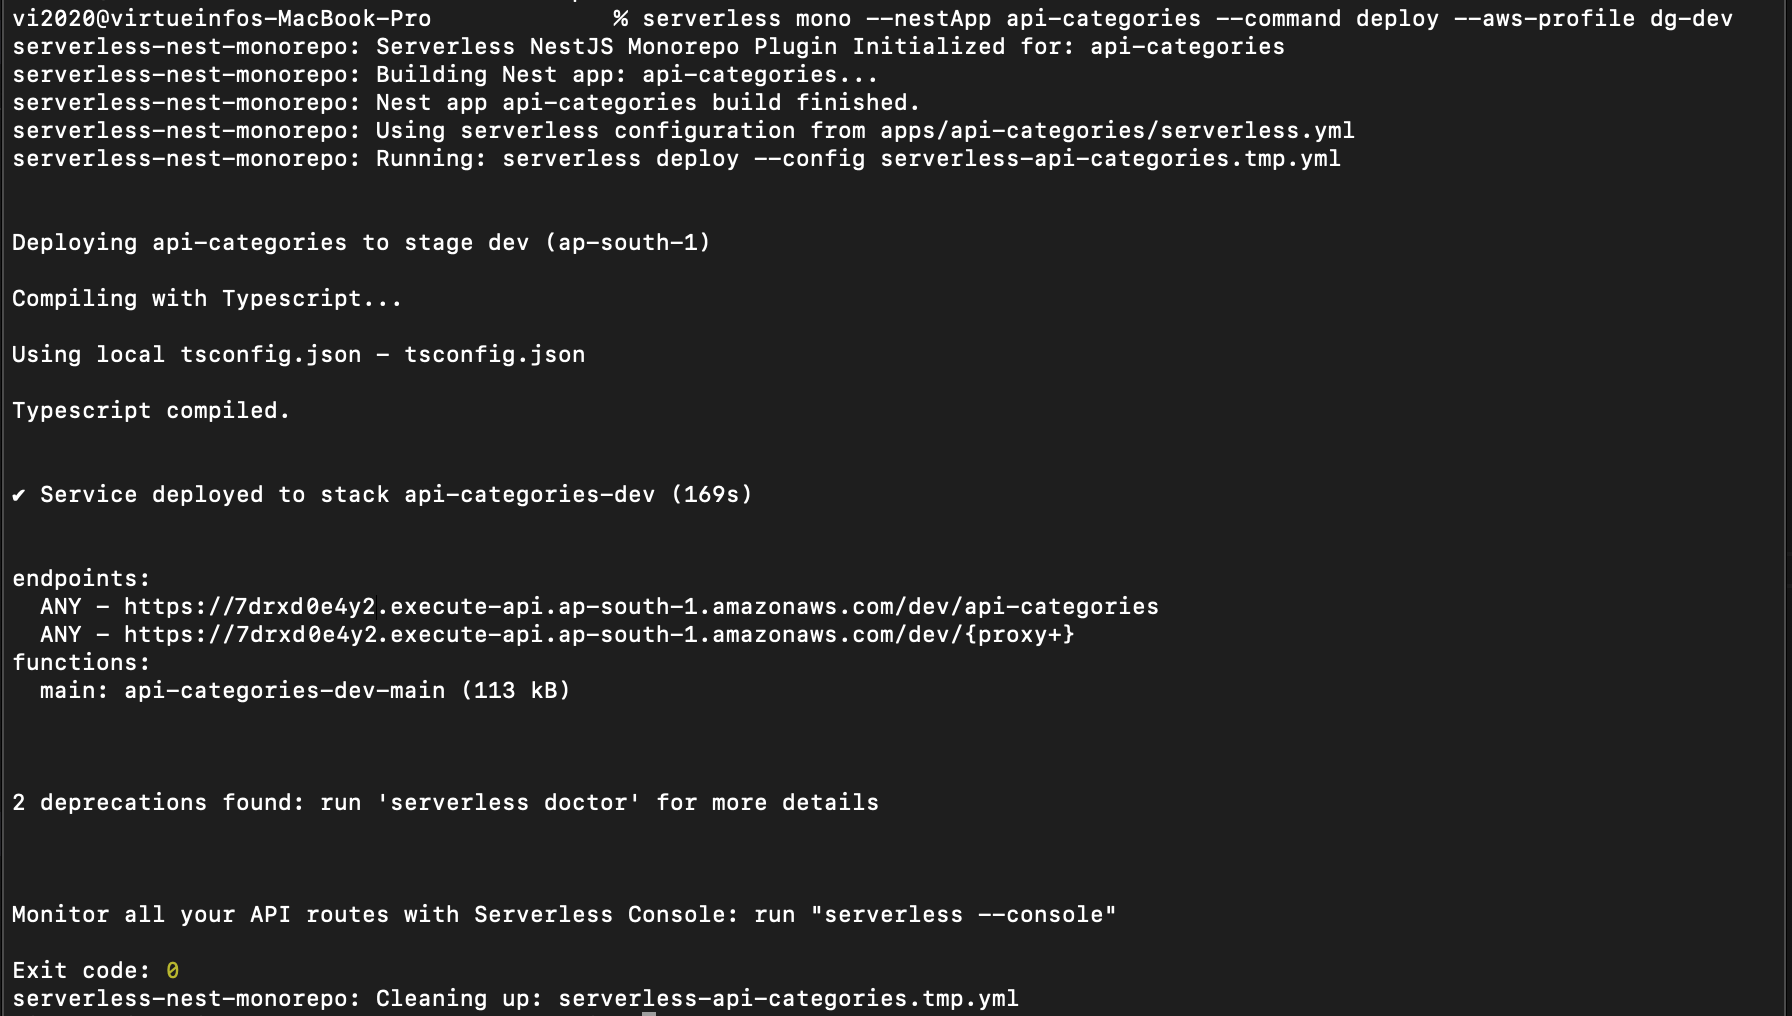
You can now test deployed service in postman using below url (endpoint url will be different for your deployment)
URL: https:// 7drxd0e4y2.execute-api.ap-south-1.amazonaws.com/ dev/ api-categories/categories
Method: GET
You should get categories json in response.
So in this post we have defined our microservice based serverless architecture, created a simple service that returns some json data and deployed it on aws.
References:
https://nestjs.com/
https://serverless.com/
https://aws.amazon.com/lambda/
https://aws.amazon.com/api-gateway/
Thanks for reading this post, comment your questions and suggestions.